|
Team KIWI (6 members)
Olivia Tristan Joel Deacon Kellan Mackenzi |
Team GRAPES (7 members)
Cory Justin Tai Kiernan Clayton Leo Griffen |
22 April 2024
- Most of you will be working on completing A11 - One Minute Video.
- A few of you will be finished with A11, and for you, I present A12 - A TV News Program.
- Assignment 12 - A TV News Program (10 minutes in length)
- ASSIGNMENT HANDOUT - explains the project
- This semester, we will have all first timers participate in ONE LARGE GROUP (so you have enough actors for your videos).
- This assignment is weighted 3x more heavily than previous ones (think of the magazine cover's weight when we learned about layout).
- We will start with FOUR weeks to complete this project and some might need a little more time.
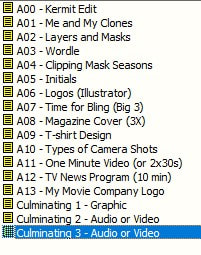
The next project is actually your multi-part culminating assignment.
- DEMO - Green Screen (Boys in a Raft)
- For Green Screen (Ultra Key)... sometimes, also called a Chroma Key
- Effects - Video Effects - Keying - Ultra Key
- Key Color (use eye dropper to choose the colour you want to "key out")
- In Effect Controls, choose Ultra Key - Setting and switch to Aggressive, if the default has not worked for you.
- To improve green screen effect even more, go down to Matte Generation settings.
- Try decreasing Highlight, increasing Shadow, and increasing Pedestal (black levels) to improve your effect.
- VIDEO TUTORIAL - How to use a Green Screen in Premiere Pro
- VIDEO TUTORIAL - How to do "Picture in Picture" and "Side by Side" clips
- Hang large green screen by elevator (lots of natural light).
- For Green Screen (Ultra Key)... sometimes, also called a Chroma Key
- DEMO - Website for Teleprompting
- Video - How to Create a Border around a Video Insert
09 April 2024
- Assignment 11 - My One-Minute Video
- Create a short video, using whatever means you have available to you (video camera or phone that takes videos), that is 1 minute in length, and focuses on ONE of the following topics. You have a choice as to which topic you pick.
As you can see, some of the options require making TWO short videos to make a total of 1 minute. - **These options should hit all comfort levels. There's something for everyone!
- Create a short video, using whatever means you have available to you (video camera or phone that takes videos), that is 1 minute in length, and focuses on ONE of the following topics. You have a choice as to which topic you pick.
- CHOOSE ONLY ONE OF THESE OPTIONS
- Public service announcement (PSA) - topic of your choice (1 minute)
- 2 x 30 second commercials (can be funny, but keep it clean)
- A common task reversed (record it and then reverse the motion and save it)(1 minute)
- A trailer for a movie (1 minute overview using video that YOU have recorded). Be creative. Lego figures work well, for instance.
- A life lesson demonstrated. A "life hack" or encouragement for how to live a good life. You know the stuff. (1 minute)
- A short interview with a friend or someone in your home. (1 minute)
- NEEDS to HAVE
- Total of ONE MINUTE of original video - one minute long or 2x30 seconds. Intro and end credits NOT part of this accumulated time.
- Intro title screen with title of your project, your name, course code, date.
- Smooth video and audio transitions between parts. *I will teach you this.
- End credit screen with names of all who participated in the making of the video and what jobs they had.
Example: Written by James Smith - You will export and upload your FINISHED VIDEO as an .mp4 video file. You get this by choosing H.264 for the format.
- Everyone will edit and submit their own version, even if you filmed it as a small group.
02 April 2024
Making a Video
- Ideally, you have all had a chance to work through the Premiere Pro tutorials. If you got through all of them, you are at an advantage.
We are now going to begin some activities related to video editing. - Basically, here are the steps involved with editing videos...
1. Find content either online or created by YOU and get it onto your computer.
2. Import the content into the program you are using to edit video.
3. Drag the content into the "Timeline" (or whatever your software calls it).
4. Arrange the clips to your liking and play them, in order.
5. Manipulate the video and associated sound, as you wish. Delete the sound and add music; you name it!
6. Add titles, sounds, transitions, and credits.
7. Export your finished movie as a .mp4 (H.264 file).
Making a Video
- Camera Shot Types
- 1966 - The Good, The Bad, and the Ugly - directed by Sergio Leone, starring Clint Eastwood - TRAILER
- Types of Shots (some may refer to these by a slightly different name, but these are the fundamentals)
- Extreme Long Shot
- Long Shot
- Medium Shot
- Close-up
- Extreme Close-up
- VIDEO TUTORIAL - Shot Types in Cinematography (14 min - note: some swearing in one included scene)
- Watch excerpt from "The Crown" - Netflix series (Adriano Goldman - cinematographer)
- Season 3 - Episode 1 - introduces an older queen (great use of long shots and camera tilt)
- YOUR TASK - Assignment 10 - Types of Camera Shots
- In groups of 2 or 3, using your cellphones, I would like you to record examples of all 5 types of shots.
- Each type of shot needs to be, at least, 5 seconds long. There can be action in the clip, of course.
- You will return to the computer lab, upload your clips to your computer (share to OneDrive and download or use your charging cable to transfer files to the computer).
- Load the clips into Adobe Premiere Pro and place them in sequence from extreme long shot to extreme closeup ("out to in").
- What to include in your video?
- Introductory Title Screen - Types of Camera Shots (TGJ2O @ SDSS) and YOUR NAME
- Caption each shot type with what type of shot it represents. Use the Text feature in Premiere.
- End credits, if you want to try them. :)
- Export your video in the .mp4 file format. This is the H.264 option.
- Your group members can use the same footage, but EACH MEMBER edits and submits a finished video.
- Good luck!
27 March 2024
- Finish Assignments 8 and 9 and SUBMIT THEM in the course Handin folder, when finished. Follow the instructions carefully for their submission.
- For the magazine, remember to click on SPREADS when exporting the .pdf. (it's a little "radio button" option, near the middle)
As previously requested - please use the HEADPHONES that you have brought from home.
In preparation for the remaining projects, this semester, that deal with video... - TUTORIALS - Adobe Premiere Pro
- Tutorial 1 - Get to Know the Premiere Pro interface (just watching)
- Tutorial 2 - Learn 5 Editing Basics (just watching)
- Tutorial 3 - Create a Project and Import a Clip (watching and doing)
- Tutorial 4 - Explore Premiere Pro panels (watching and doing)
- Tutorial 5 - Learn Editing Skills (watching and doing)
- Work through the various tutorials to build up your fundamental competencies. Work at your own pace and try to complete EACH step that is laid out for you. Once enough of these have been completed, to my satisfaction, I will begin to assign both individual and group projects.
Your tutorial files can be found in Course Folder - Assignments - First Timers folder.
It would be convenient to copy them in your OneDrive COMM TECH folder that you created. Maybe create a new folder called, Video Tutorials.
22 March 2024
- Continue working on your magazine cover. What I have seen so far, is great. Keep up the good work!
- Remember to click on SPREADS when exporting the .pdf.
- A fun, yet useful, assignment. Some day, you may actually find yourself designing a t-shirt for an event.
- Using Illustrator or Photoshop or InDesign (or a combination of all three, like your magazine cover), design the front of a t-shirt that you would be proud to wear and means something to you or is for a real or fictitious (made up) event. Keep it appropriate...
It must be entirely of your own design - ie. your own photo (Photoshop) or your own logo design (Illustrator) - Check out: 10 Tips for Creating Better T-shirt Designs
- You need to save/export the finished file in Adobe PDF format.
- **If you search Google or Bing for a high resolution image of the colour of the shirt on which you would plan to place your graphic, that would be ideal. Just give the shirt its own layer so it can be removed, later.
- Next up... VIDEO! - Please bring headphones to class (that either work with the school computer OR your phone - either way).
- Please bring your phones to class, each day, for the next while. (like I have to remind you of this... ;)
18 March 2024
- What have you done so far...
- Cut-out and moved fragments (clones) of photos in Photoshop
- Experimented with Layers and Masks in Photoshop
- Created a wordle (manipulated text) in Illustrator
- Used clipping masks to have photos show through text in Illustrator
- Completed tutorials in Illustrator to expand your skills
- Converted text to editable objects, in Illustrator, to make artistic initials
- Worked with Drawing Tools in Illustrator to replicate and create logos
- Combined the "big three" - Photoshop, Illustrator and InDesign - to put your edited face into a clock
- Assignment 8 - Magazine Cover
- You will attempt to replicate/reproduce the cover of a popular magazine. You will create all of the elements on this magazine yourself.
You will create an advertisement on the back cover (left side) and a reproduction of the front cover (right side). You should create the masthead (title of the magazine) and any "fancy text" in Illustrator. Photos must be your own. Remember, InDesign is all about PLACING elements created/edited in other programs. - Use the template provide, below. There is a specific way to download the file to use in InDesign.
InDesign Template for Magazine Cover
(must right-click and choose Save linked file as... and save in your OneDrive folder - A8 - Magazine) - Previous Magazine Assignment Examples
Example 1 Example 2 Example 3- Some helpful websites...
- For Free Fonts - www.dafont.com
- For help in matching a logo font - www.namethatfont.net
- Some helpful websites...
- Check out this Rogers Sportsnet commercial which highlights the creation of their new magazine cover.
- Sportsnet Magazine video
- Instructions for Magazine Cover
- Download cover template file.
- **Make certain that you save ALL FILES RELATED TO HIS PROJECT in the same folder. This entire folder will be handed in for grading.
- Also, label your InDesign layers appropriately for the different parts of this project.
- Front Cover
- Photo on cover must be your own or taken of you by a friend. Can be of a pet or object from home or school, as well.
- Masthead (title of magazine) should be created in Illustrator and placed on the right-hand side of the template.
- The masthead should also appear, in reduced size, on the spine of your magazine.
- You are trying to recreate the layout of a magazine that you have found on the Internet - Vogue, Sports Illustrated, TIME, etc. Often, students will place an example of the cover that they are trying to replicate on its own layer, in the background. The transparency of the layer is adjusted to give it a ghosted image.
- Find a high-resolution bar code (Google or Bing) and place it on your cover.
- Spine
- Reduced-size copy of masthead needs to appear on the spine.
- Month and Year
- Other?
- Back Cover
- This is an advertisement that YOU will create. It can be a reproduction of a real advertisement that you have found or from your own imagination. Once again, it must include photos that you have taken or images that you have created.
- YOU must create all of the elements in the advertisement, including any logos, if applicable.
- Front Cover
- What to submit for grading?
- 1 - A PDF Copy of your Magazine Cover
File - Export - Adobe PDF (for print) to create a "portable document format" (.pdf) of the magazine. - Make sure that you click the SPREADS option under Pages in the final dialogue box with a lot of options.
- 2 - COPY your entire "A8 - Magazine Cover" folder from OneDrive, and all of its contents, over to the HandIn folder for grading.
I need this to see if you have labeled your Layers and organized your assets.
- 1 - A PDF Copy of your Magazine Cover
- You will attempt to replicate/reproduce the cover of a popular magazine. You will create all of the elements on this magazine yourself.
- DEMO - recorded actions and droplets in Photoshop! Very handy.
04 March 2024
- Demo - InDesign
- Assignment 7 - Photoshop, Illustrator, and InDesign - "Time for Bling!"
- This is an exploration of the Adobe trifecta - Photoshop - Illustrator - InDesign.
- Instructions
- Create the needed files in your folder called "A7 - Time for Bling" in your One Drive Comm Tech folder.
Save ALL files associated with this project in this folder.
The Illustrator Part - Create a new page in Illustrator, landscape view, and letter-sized at 300dpi.
- Create a clock face including numbers in the proper rotation and placement (using the alignment feature).
The Photoshop Part - Have someone take a photo of your head, just past your shoulders. You may borrow a camera, if needed.
- Disguise your face using Photoshop. Gather images from the Internet of mustaches, tattoos, glasses, and the like, to disguise your face. If you search for .png files, the backgrounds should be transparent (this will help immensely).
- When your disguise is complete, save your face as a .jpg to flatten and shrink the file size. You may want to save the .psd, just in case.
The InDesign Part - Open InDesign and create a new landscape-oriented page at 300dpi (under the Print tab).
- On one layer, create a box using the Rectangle Frame Tool. Use File - Place (keyboard shortcut is CTRL-D) to place your clock, made in Illustrator, into this frame.
- On a second layer, create a circle using the Circle Frame Tool (just under the rectangular one) that is the same size as your clock. Place your disguised face in this frame. Adjust so that the clock layer is on top of your disguised face.
- Type your name in the bottom right-hand corner.
- Go to File - Export and choose Adobe PDF (Print) and export your work.
- Copy it to your HandIn folder. Voila!
- Create the needed files in your folder called "A7 - Time for Bling" in your One Drive Comm Tech folder.
04 March 2024
- Here's a little secret...
- Illustrator - how to convert a rastered image or sketch to a vectored object
- Click on the object to select it.
- Choose Object - Image Trace - Make and Expand to convert to a vectored image.
- First, UNGROUP the resultant image and delete the white background.
- By default, the image will now have a Grayscale colour scheme.
Click on the Color Properties palette (right). There is a menu near the top right of that box.
Click on it and choose RGB (for screens) or CMYK (if you intend to print it on paper).
- Illustrator - how to convert a rastered image or sketch to a vectored object
01 March 2024
- Assignment 6 - Logos in Illustrator
- ** IF you have difficulty following these text-based instructions, here is a 16 min. video explaining what to do.
- Try to follow along and pause it, when needed, to replicate these tasks.
- VIDEO - A6-Logos in Illustrator Instructions
- This assignment will force you to use such tools as the Shape, Pen, Eraser, Eyedropper, and Pathfinder, among others.
The final logo, 4-British Petroleum, comes with its own tutorial video and you will be asked to use some "higher end" tools to finish that one. Save it for the end. - Right-click, "Save Link As" (or similar) and download this folder - A6-Logo Assignment.
Save it in your Comm Tech folder on OneDrive under A6 - Logos.
All the materials that you will need for this assignment are in this folder.
Right-click on the folder and choose Extract All and then click on the Extract button. - Access 1-PEPSI in the UNzipped folder (double-click on it).
See if you can create a vectored version of all 4 logos, one-at-a-time. - Please complete them IN ORDER.
- Your task is to recreate the given logo as a vectored file in Illustrator. Just save the file that I have given you with your version of the logo in the file, as well.
- **When you have finished, or have gone as far are you can, just copy the entire folder to your HandIn folder for grading.
- How to Convert the .jpgs to .ai (vectored)
- To convert the jpgs of logos to vectored images, highlight the logo and click on Object - Image Trace - Make and Expand.
- There will be a white object in any empty space in your converted logo. With the converted image highlighted (clicked on), choose Object (menu) and Ungroup. Then, delete the white object in your logo. There will also be small white objects in any closed letter like an A or B. You will need to delete those, too.
- By default, it makes the converted image black and white. Go to the Window menu, at the top, and choose Color.
Make sure the converted image is highlighted (clicked on) and go to the little menu in the top right of Color properties. Choose RGB (for screens) or CMYK (for printing) to change the image so that you can sample and change the colours of the shapes.
- ** IF you have difficulty following these text-based instructions, here is a 16 min. video explaining what to do.
28 February 2024
- continue working on previous assignments until they are finished and submitted in the HandIn folder
- 4 - Seasons (clipping mask)
- 5 - My Initials
- Tutorials to help you learn some essential skills in Adobe Illustrator
- Open Adobe Illustrator
- Tutorial 1 - Using the Eraser Tool in Illustrator
- As you watch this video, pause it at certain intervals and try to replicate the task on your own document.
Remember, to get squares and perfect circles, you press and hold SHIFT when making the shape.
VIDEO - How to cut a shape using the Eraser Tool
(If you hit the CC (closed caption) button near the bottom of the video, near the middle, you can just read the instructions instead of listening to them. It would get fairly noisy if everyone listens to the video without headphones. If you have headphones, hurray!)
- As you watch this video, pause it at certain intervals and try to replicate the task on your own document.
- Tutorial 2 - Using the Pathfinder Tool with Shapes
- As you watch this video, pause it at certain intervals and try to replicate the task on your own document.
- VIDEO - Pathfinder Tutorial for Beginners
Right-click and choose "Save Link As" (or similar) to download the tutorial file, below, to use.
FILE TO USE - Tutorial File for Illustrator
You have to save it in your Comm Tech folder and open it with Illustrator.
- Resource
Pen Tool Cheat Sheet for Illustrator
27 February 2024
- Demonstrate
- Synthesia - generic presenters using artificial intelligence. The way of the future?
- Dafont.com - how to find and install unique fonts.
- Continue working on previous assignments until they are finished and submitted in the HandIn folder
- A2 - Layers and Masks
- A3 - Wordle
- A4 - 4 Seasons Clipping Masks
- Remember... Adobe Color Website
- Analogous Colours - groups of 3 colours that are next to each other on the COLOUR WHEEL
- Complementary Colours - 2 colours on opposite sides of the COLOUR WHEEL, the combination provides high contrast
- red/green, blue/orange, yellow/purple
- Use Screen Snip or Print Screen to save the colour scheme and paste it beside your project in Illustrator.
Then, use the Eyedropper tool to sample it for the colours you need.
- Assignment 5 - My Initials
- This is an exploration of type and how it can create a statement.
- Instructions
- Create a new page in Illustrator, landscape view, and letter-sized at 300dpi.
- Choose different fonts for your first and last initials of your name.
- Resize the letters to fill the page.
- Choose Type - Create Outlines to convert your initials, recognized as text, into editable shapes.
- Using your creativity, use shadow, colour, duplication, rotation, skew, overlap, etc. to create something "cool" with your initials. Maybe, it's a representation of YOU, somehow? This is up to you.
- Submit as a .pdf and as an .ai file.
- Examples: Example 1 Example 2 Example 3 Example 4
22 February 2024
- Continue working on previous assignments until they are finished and submitted in the HandIn folder
- A2 - Layers and Masks
- A3 - Wordle
- Assignment 4 - Illustrator - Images in (behind) text representing the 4 Seasons
- ** For this assignment, you will be handing in an entire folder with all of the photos and the Illustrator file that you used to complete this project.
** You will also use File - Save As - to save the assignment as an Adobe PDF - A4-Seasons. - Using SPRING, SUMMER, AUTUMN and WINTER, you will create 4 letter-sized (8.5"x11") sheets in Illustrator that represent the 4 seasons.
- EXAMPLE - SURF text with image in behind
- Technique - Clipping Mask on a Compound Object
- What you need to include..."the basics".
- Text with images related to the seasons in behind the text.
- Drop shadow on your season text.
- Then, the rest is up to you. Be creative!
- Some important hints/keyboard shortcuts.
- With the background image and your text selected, right-click on the image and choose Make Clipping Mask.
- If you want to distort your words, you have to highlight the word, go to the LINKS panel, choose the pull-down menu, and Embed Image(s). Then go to Type -- Create Outlines. Doing this will allow you to use the tools that are 8 tools down, on the left (hold down the left mouse button), on the Tool Bar (Width, Warp, Twirl, Pucker, etc.).
- How to add a Drop Shadow.
- Go to Effect -- Stylize -- Drop Shadow
- How you will be graded...
- 60's - something is missing. Didn't use a layer mask to put the photos behind the text.
- 70's - fulfilled the basic requirements of the assignment
- 80's - met basic requirements and surpassed them
- 90's - you rocked this assignment. Everything you needed was there and much more!
- ** For this assignment, you will be handing in an entire folder with all of the photos and the Illustrator file that you used to complete this project.
14 February 2024
- Continue to work on A2 - Layers and Masks and upload, when finished.
- ADOBE COLOUR Website: https://color.adobe.com/create/color-wheel
Use "Screen Snip" tool (bottom right of screen) to select the colours you want to sample for your project. - Assignment 3 - Wordle (Adobe Illustrator)
- Using Adobe Illustrator, manipulate and adjust text to create a "Wordle". Put image in background layer.
- The website, thesaurus.com, will help you to find synonyms (words with similar meanings) for your Wordle.
- How to Create your Wordle
- place a photo in a background layer and reduce the opacity
- use the PEN tool to outline parts of the shape and add text with TYPE ON A PATH tool
- change colours, size and thickness of text to fill/outline the shape to make your Wordle
- hand in Wordle as a .pdf file (eg. A3-Wordle.pdf)
- Some resources:
- TEACHER DEMO - type on a path tool and how to arrange the text on the shape, save as .pdf
- hand in Wordle as a .pdf file (eg. A3-Wordle.pdf)
- If you run out of work, check out this website from Adobe with all of their Photoshop tutorials for Adobe Photoshop CC. Choose one that interests you and try it.
- Awesome NON-Adobe online tutorials for PHOTOSHOP
13 February 2024 - Happy Valentine's
- Your next assignment involves Adobe Illustrator. These tutorials will help you get to know the program.
- Getting to Know Illustrator Tutorials
- Work through the following tutorials. You will be expected to know the material found within them, in order to complete an upcoming project.
12 February 2024
- Continue working on Clones assignment until finished.
Please submit it in your Handin folder (on your desktop) as A01 - Me and My Clones.
- Assignment 2 - Layers and Masks (Photoshop) - "The Great American West"
- "On a Layer Mask, Black Conceals and White Reveals"
- This assignment will help you to learn about layers and masks in Photoshop.
- Access the website with the video tutorials - Adobe Photoshop Tutorial - Layers and Masks
- Under "WHAT YOU'LL NEED", click on the Get Files link to download the elements used in this tutorial.
- Move/drag the downloaded ZIPPED folder to your OneDrive folder for this project.
- Right click on the folder and choose Extract All (you must "unzip" the folder) and accept the file name and saving location that come up.
- Using your headphones, watch and listen to the video entitled, "Get to know Layers".
- Pause the video and use Alt-Tab (hold down the Alt key with your thumb and tap on the tab key with your index (pointing finger) to switch to another open program, and vice-versa) to switch to Photoshop to try what the tutorial has just shown you. USE the FILES that you have downloaded for this activity, of course.
- Watch each of the videos and perform what they demonstrate to you on your OWN copy of the tutorial files.
1-Get to Know Layers, 2-Combine Images using Layer Masks, 3-Add Text and Effects, 4-Include Vector Graphics, and 5-Export and Save the Design. - ** Creating a Star Shape in Photoshop
- Upload your finished work to the course Handin folder.
- To help improve your competency with masks and layers, try these tutorials.
- 1 - Cutting out Photos Using Masks
- 2 - Combining Images Using Layers Masks
- If you run out of work, check out this website from Adobe with all of their Photoshop tutorials for Adobe Photoshop CC. Choose one that interests you and try it.
- Awesome NON-Adobe online tutorials for PHOTOSHOP
08 February 2024
- When you are happy with Kermit and his shadow on the sidewalk, try the first assignment.
- Assignment 1
A01 - Me and My Clones (Photoshop) - need your phone cameras!- In teams of two, students will decide on a location and action in which to photograph themselves in various positions. A student's teammate photographs the student while they pose in ways in which the resulting figures will be interacting when placed together in a montage. Students then manipulate their photos to have their clones 'interacting' in one location. For example, students could form a pyramid of clones, trip themselves in the hallway, or jump over themselves playing leapfrog.
- You need a total of SIX clones in the photo with at least two interacting in some fashion.
Upload your photos to OneDrive and access them on your classroom computer. Edit as needed.
* Save all files to support this project in your OneDrive - A01 - Me and My Clones folder. - See examples, below and this photography company from Iowa, USA - Shirk Photography.
- When finished, upload your work to CommTech-Members-YourLogin-HandIn folder.
- Hand in work as A01 - My Clones.psd
Must be .psd format in order that Mr. Weigand can still see the layers. - Be sure to ask your neighbour or Mr. Weigand for help, when needed.
- Hand in work as A01 - My Clones.psd


06 February 2024 - Tuesday
- Lesson
- Using Photoshop
- Layout of program
- Examples: Levels/Curves/Exposure, Healing Brush, Photo Filter, Patch Tool
- Layout of program
- Demo pixels (bitmapped or rastered) and vectored (scalable) graphic differences - Photoshop and Illustrator
- File types - (.jpg (.png,.tif,.bmp), .mpg, .mp3, .mp4 and their origins, .psd, .ai, .indd, .htm)
- Colour Modes - RGB (red,green,blue) vs. CMYK (cyan,magenta,yellow,black)
- Significance of 72 point font in Word - why the random numbers?
- Using Photoshop
- Other notes
- Fake vs. Reality - will soon be VERY hard to tell the difference, if not already
- Check this out - Top 10 DeepFakes (11 min.)
SuperBowl LIV (2020) Commercial Example with Jason Momoa
How they made the commercial
- DEMO Photoshop
- Using Photoshop, extract Kermit from this photo and place him in this sidewalk photo.
You'll have to right click on the blue links, above, and choose your OneDrive folder to save them.
Save it in your A0 - Kermit Edit folder. - Various techniques - Lasso and Delete, Object Selection Tool (Shift-click to add, ALT-click to remove)
- Ask Mr. Weigand to see it, when finished.
- Using Photoshop, extract Kermit from this photo and place him in this sidewalk photo.
- Photoshop
- Finish placing Kermit on the sidewalk.
- Try to add a realistic "drop shadow" to Kermit.
- To Create a Drop Shadow
- VIDEO - How to Create a Realistic Drop Shadow Tutorial
- Make sure that Kermit's layer is selected.
- Go to the fx button at the bottom of the Layers properties window (right). Choose Drop Shadow and click OK.
- Now, you want Kermit's shadow to have its own layer, so...
With Kermit's layer selected, choose Layer (at the top), Layer Style and Create Layer.
Click OK. - Press CTRL + T which is "Free Transform"
- Go to the top right, beyond the anchor square, and rotate the shadow.
- Move it to where you would like to see the shadow. Voila!
- When you are happy with Kermit and his shadow on the sidewalk, try the first assignment - A1 - Me and My Clones.
05 February 2024 - Monday - FIRST DAY
- Seating Plan
- Mr. Weigand
- Show some examples of work produced in Comm Tech and discuss.
- Discussion
- Diversity of abilities in the class
- Discuss computer upgrades - Adobe Creative Cloud 2022, RAM upgrades
- Discussion of Media Landscape in 2024
- What is this all about, anyway?
- Photo-taking and editing, graphic creation, video creation and editing, webpage creation, audio work, animation
- Bring your phones to class, each day!
- Log in to network.
- We're going to clean up your OneDrive folders and sync them to desktops.
** We set LOCAL OneDrive folder to 'sync' with ONLINE OneDrive folder (backup)
- We're going to clean up your OneDrive folders and sync them to desktops.
- ** Set up OneDrive on phones and desktops.
- Your first task - take a photo, upload it to OneDrive, access it on the school computer through your OneDrive account.
- Your first task - take a photo, upload it to OneDrive, access it on the school computer through your OneDrive account.
- Access your OneDrive folder on your computer (locally), NOT the online version. Mr. Weigand will show you how to do this.
- Right-click on your mouse and choose NEW, then FOLDER.
- Create a folder called, COMM TECH 23-24 in the local copy of your OneDrive folder.
- Create the folder structure, below, in your OneDrive folder, for your assignments, this semester.
